Sunday, June 10, 2012

A Summer for Fear Conquering

Finally!  School, assignments, and graduation are over, and I don't have to worry about picking a college and filling out applications anymore.  It's time for more knitting!  This summer, I plan to conquer two of my greatest knitting fears.  Which are *drumroll*

Lace and Sweaters!

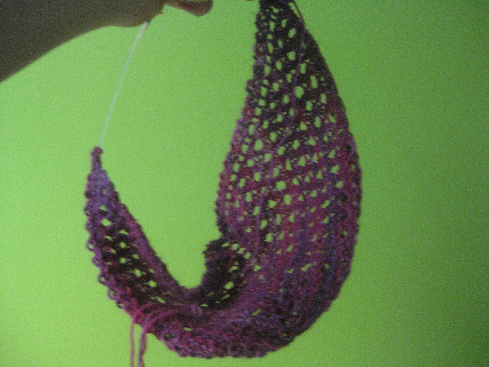
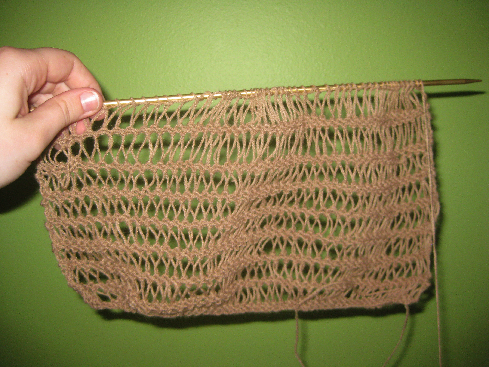
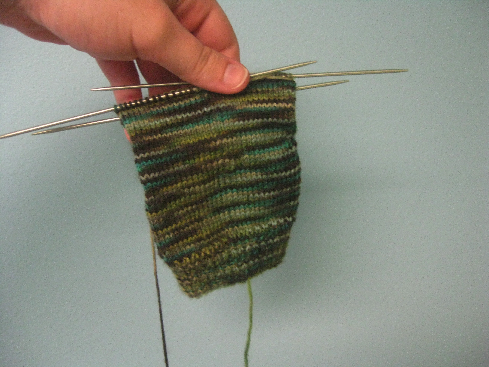
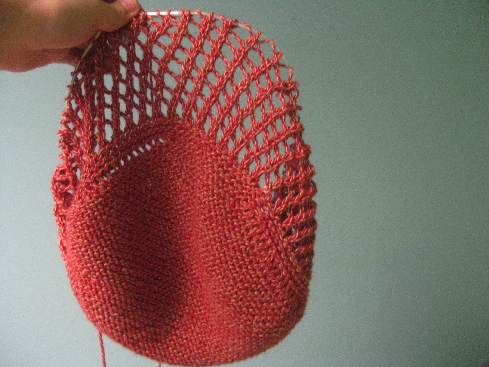
I have tried and tried and tried to knit lace, and every time I end up pulling and pulling and pulling out stitches, 'accidentally' ripping the messed up piece.  Through all of this I have learned to respect the lace and its difficulty.  I am going to find a simple lace scarf pattern to master this summer.

My fear of sweaters comes from the commitment and cost.  I know I can do it, and it can't be too difficult, depending on the piece.  However, sweaters are so expensive to make!  (Especially when you're not a size 2)  And having never made one, how am I supposed to know all that investment was worth it?  Fortunately, Nicole is a small size, and I'm going to make a simple boat neck sweater from KnitPicks.  I ordered the yarn (in colors Surf and Swan in the suggested brand of yarn.)  It should come this week.  Today I'm going to get my needles.  The pattern downloaded, and it looks super doable.  I'm really excited to get started!

So, this summer, follow me as I give updates on my projects.  Also, feel free to share your greatest knitting fears and tackle them with me.  Good luck!

Dishcloths for Africa


This summer our church sent a team to Africa, and part of the time spent there will be for women married to church leaders to come to a conference to get a break from busy life.  At the conference, the women will be given some fancy lotion, other spa items, and a hand knitted dishcloth.  The project started with a need for 40-50 dishcloths but quickly grew to around 80!  With the help of a growing number of knitters the project was completed.  I wanted so badly to take a picture of all the cloths I made, but we had to turn them in as we finished them so they could be counted.  In the end, I estimate that I donated approximately 15-20 dishcloths.


Most of the yarn used was donated, and thus not very...nice.  The one pictured was made in some leftover itchy Red Heart.  I felt kind of bad having to knit up something not made with nice cotton dishcloth yarn but they I realized - Africa is one tough cookie!  These cloths aren't going to be in a nice clean American kitchen.  They're going to be outside by the cooking fire and next to a wash basin in the dirt.  Red Heart is super durable, and this is great yarn for a project like this, if any reader out there plans to do this in the future.


I wish the team the best of luck in Africa!  (One team member just happens to be my sister Nicole ^_^)  Have a great time helping these tired women at a relaxing conference!

Friday, June 8, 2012

The Roommate Hat


So college is in like not even three months, but I don't even know my roommate yet!  When I do meet her, whoever she is, I plan to give her this lovely hat.  Charisma from Loops and Threads (a Michael's brand) helped me pull this together.  I just love how the colors change effortlessly in such a cute way.  I knit this on size 8 needles (I would have gone larger because this is a bulky yarn, but I didn't have any 16 inchers in a size larger) in seed stitch.  I would give out the pattern, but I can't remember the how exactly I did the decreasing (It was horrendous, btw)  Just wanted to show the world my little creation.

Thursday, May 24, 2012

Much Goes Unfinished

You might be wondering why I haven't written in here for a while (and then again, maybe not).  This is due to the fact that not much has been going on finished in the knitting department.  So I decided to dedicate a post to what I haven't been finishing and why.


#1 - The 'Easy as Pie' Shawl


The Story:  I started this puppy several weeks ago with my Stroll Fingering yarn from KnitPicks in Dolly.  Lace hates me; I'm sure of it.  However, lace has always fascinated me, and I am determined to knit some!  This shawl looked non-intimidating (see the name), so I gave it a whirl.

The Reason:  I made a mistake!  I've fixed it now, but I have no motivation to go on.  The fact that this shawl looks so pitiful without the blocking is also a factor in not wanting to continue.  Also, I can't find wool wash anywhere but online!  Do you think I could use Woolite?

#2 - The 'Fascinate' Scarf


The Story:  This pattern is from Berocco, and I fell in love with the simplicity of it.  As an added bonus, I had some sock yarn to use from my great grandmother's stash!

The Reason:  This wasn't really for anyone or any occasion.  I thought I could give it to my mother for her birthday later this year, but she discovered it, so it wouldn't have been a surprise.  Also, I picked it up after a break, and if you look at the top I think I am doing too many yarn overs now  (The gaps are wider).  I don't want to take it out and start over, so I probably will never finish this.

#3 - The Sock


The Story:  Ahh, a simple, stockinette sock made from the same stuff as my shawl but in Treefort.  This has been sitting next to my nightstand for at least a month.

The Reason:  I have this itching feeling it's going to be too small!  If it is, I'll give it to my small footed sister, but I really liked this color!  Again, no motivation to finish...and start another one.

#4 - The Beach Bag


The Story:  This is actually called the Hexagonal Market Bag, but I plan to use it as a beach bag.  I love the structure and make of market bags; they just make sense.  This is my first one, and I can't wait to finish it!

The Reason:  Time.  Just started it two days ago, and I actually plan to finish this puppy!  I love the colors and the simplicity of the pattern.  It's simply fabulous.


Tuesday, April 24, 2012

Window Dishcloths - Pattern


The Story:

Our church is getting ready to go to Uganda this summer, and we knitters have gotten together to knit seventy dishcloths for women coming to a conference we are leading.  I wanted to knit a basic stockinette dishcloth with a garter stitch border, but the little voice inside my head kept saying "it's going to curl over!"  So, I decided to make my basic dishcloth, but I put a big ol' garter stitch cross through it to prevent the curling.  Unfortunately they still curl a little bit, but the garter stitch definitely helps.  It also keeps things interesting.

Supplies:

Needles:  US size 8 straight needles.  (I recommend the ten inch kind)
Yarn:  The yarn for these dishcloths was donated, so I didn't have much say.  The red one was made out of Caron Simply Soft, and the green one was made out of Redheart.  I would suggest using actually dishcloth yarn like Lily's Sugar 'n Cream.
Misc.:  Darning Needle, Scissors

Abbreviations:

CO: Cast On
K: Knit
P: Purl
BO: Bind Off


Directions:

CO 35 Stitches
K for three rows.

Repeat the following two rows for a total of nineteen rows, not counting the three garter stitch rows.  End on a Row 1
Row 1: K all
Row 2: K3, P13, K3, P13, K3

K three rows.

Repeat Rows 1 & 2 for nineteen more rows.

K three rows.

Bind off loosely.

Sunday, April 8, 2012

Thoughts on Short Needles

My first pair of needles were fourteen inches long, US size 8, and plastic with green and orange swirls in the middle.  They were the cheapest and longest pair from Hobby Lobby on that day.  I saw the ten inch needles just a few rows over, but I figured the fourteen inchers would be far more useful, especially with larger projects.  Later on I inherited the needles from my great grandmother, and her collection contained needles of every size and length.  However, even for my smaller projects, I used my fourteen inch needles.

Just a few days ago I needed 7's for a dishcloth, but alas, one pair was still in a scarf I had started a month ago and the other was in my sister's dishcloth.  I was forced to use some ten inch 8's.

Wow, what a difference!  Short needles are so much more intimate and cozy.  I feel like I can knit on our sectional and not worry about hitting anyone in the face with the ends.  Lesson learned - don't fall into the frugal trap of buying fourteen inchers!  If you're working on a small project, splurge on a pair of ten inchers!  Needles only cost like three bucks a pair; it's an investment, and your family will thank you.

Saturday, March 17, 2012

Daphne Mittens - Pattern


The Story:


I was going to make mittens for my friend Daphne, and I had a really hard time finding a cute mitten pattern that I liked.  All the cute patterns seemed to be on fingerless mittens.  (In hindsight I realize that perhaps I could have converted a fingerless pattern to regular mittens, but oh well!)  I found a decent pattern and casted on, but a ways into it I realized I didn't like how it was turning out.  I made a small revision, then another, then another, and finally the mittens didn't even resemble the mittens they started from.  I am sharing these instructions to add more cute mitten patterns to the great interweb.  So, enjoy these wonderful cabled and bobbled creations.


Notes:
-I wrote the instructions out for people who have knit mittens before.  I don't suggest you start with these!
-These mittens have some holes due to the many bobbles.  They are mostly for decoration and not for necessarily for warmth.  I suggest wearing another pair underneath if you want to wear them in the cold.


Supplies:


Needles: 4 US size 8 double pointed needles
Yarn:  1 skein of Swish worsted from knitpicks.com (or 110 yards of worsted weight yarn)
Misc.: Darning needle, cable needle, stitch holder or waste yarn, scissors


Abbreviations:


M1: Make one stitch into next stitch, increase of one (insert needle as if to knit, wrap yarn around as if to knit, pull needle down and then go back into the stitch, knit normal and pull off needle)


3B: A small bobble.  K1, P1, K1 into the next stitch.  Turn the work.  P3.  Turn the work.  Slip three stitches over the first stitch as if you were casting off.  Knit into the back of the stitch.  You should have no increase or decrease in stitches


5B: A large bobble.  K1, P1, K1, P1, K1 into the next stitch.  Turn the work.  P3.  Turn the work.  Slip five stitches over the first stitch as if you were casting off.  Knit into the back of the stitch.  You should have no increase or decrease in stitches


CF4: A cable.  Slip 2 stitches onto the cable needle and hold in front.  K2 stitches from the left needle.  Slip the two stitches back onto your left needle.  Knit these two stitches.


K: Knit          K2tog: Knit two stitches together          K3tog: Knit three stitches together
P: Purl          P2tog: Purl two stitches together
b/t: Between


Directions:


Cuff: Cast on 32 stitches
Work K2, P2 rib for 12 rounds (or however long you wish)


Left Mitten:
I've split the mitten part up into four sections to make the pattern easier to read (hopefully).
Round X: [Thumb] [Stitches before pattern] [Pattern] [Stitches after Pattern]


Round 1: [M1, K1] [K2] [P2, K4, P1, 3B, 5B, 3B, P1, K4, P2] [K11] - 33 Stitches
Round 2: [K3] [K2] [P2, K4, P1, K1, 3B, K1, P1, K4, P2] [K11]
Round 3: [K3] [K2] [P2, CF4, P1, K3, P1, CF4, P2] [K11]
Round 4: [K3] [K2] [P2, K4, P1, K3, P1, K4, P2] [K11]


Now start the thumb increases:
Round 5: [M1, K1, M1]  [K2] [P2, K4, P1, 3B, 5B, 3B, P1, K4, P2] [K11]
Round 6: [Knit the thumb] [K2] [P2, K4, P1, K1, 3B, K1, P1, K4, P2] [K11]
Round 7: [M1 at beg. and end of thumb, K b/t] [K2]  [P2, CF4, P1, K3, P1, CF4, P2]  [K11]
Round 8: [Knit the thumb] [K2]  [P2, K4, P1, K3, P1, K4, P2]  [K11]
Round 9: [M1 at beg. and end of thumb, K b/t] [K2] [P2, K4, P1, 3B, 5B, 3B, P1, K4, P2]  [K11]


Repeat rounds 6-9 until there are 15 stitches in the thumb, then knit Round 6 again.  Place stitches on a stitch holder or waste yarn.  Cast on 3 stitches and knit them.  These three stitches are included in the next round as you will see below.


Now for the body of the mitten:
Round X: [Stitches before pattern] [Pattern] [Stitches after pattern]


Round 1: [K5]  [P2, CF4, P1, K3, P1, CF4, P2]  [K11]
Round 2: [K5]   [P2, K4, P1, K3, P1, K4, P2]   [K11]
Round 3: [K5]  [P2, K4, P1, 3B, 5B, 3B, P1, K4, P2]  [K11]
Round 4: [K5]  [P2, K4, P1, K1, 3B, K1, P1, K4, P2]  [K11]
Repeat rounds 1-4 until you have done nine CF4's for the entire pattern.  End on Round 1.
Top of mitten decreases:
Round 1: [K1, K2tog, K2] [P2tog, K2tog, K2, P1, K3, P1, K2, K2tog, P2tog] [K1, K2tog, K1, K2tog, K1, K2tog, K2]
Round 2: [K4] [P1, K3, P1, K3, P1, K3, P1] [K8]
Round 3: [K2tog, K2tog] [P1, K1, K2tog, P1, K3tog, P1, K2tog, K1, P1] [K2tog, K1, K2tog, K1, K2tog]
Round 4: [K2] [P1, K2tog, P1, K1, P1, K2tog, P1] [K5]
Round 5: K2tog all stitches
Run remaining yarn through stitches and pull through the donut hole.  Weave in ends.


Thumb:
Put the fifteen saved stitches on two needles.
With the third needle, pick up stitches around the thumb.  (Enough so that there won't be holes)
On the first round, decrease to seventeen stitches, knitting.
Knit about ten rounds (or about 1/4-1/2 inch from the tip of your thumb)
Decreases:
K1, K2tog all the way around, K the last two stitches
Knit one round
K1, K2tog, all the way around, K the last two stitches
Finish like the top of the mitten.


Right Mitten:
The exact same as the left mitten, except the parts will be in a different order.
Instead of this from the left mitten:
Round X: [Thumb] [Stitches before pattern] [Pattern] [Stitches after Pattern] 
It changes to this for the right mitten:
Round X: [Stitches after pattern] [Pattern] [Stitches before pattern] [Thumb]
And later
Round X: [Stitches before pattern] [Pattern] [Stitches after pattern]

Changes to:
Round X: [Stitches after pattern] [Pattern] [Stitches before pattern]
Decrease similarly and the thumb will be finished the same.  Weave in ends, follow care instructions for the yarn you used, and enjoy!


I did my best to edit this pattern, but if you see any mistakes please leave a comment!
This pattern was last revised on March 17, 2012