
The Story:
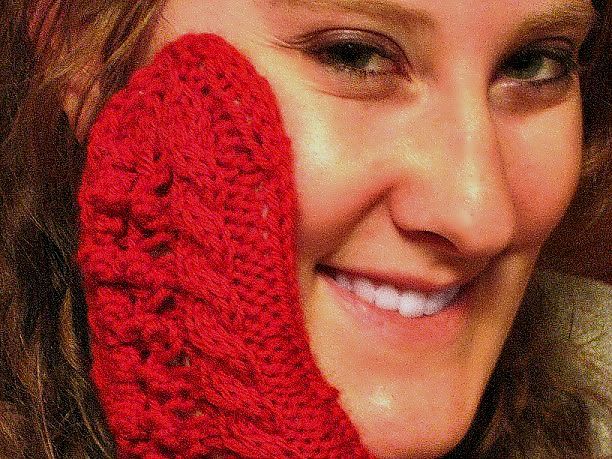
I was going to make mittens for my friend Daphne, and I had a really hard time finding a cute mitten pattern that I liked. All the cute patterns seemed to be on fingerless mittens. (In hindsight I realize that perhaps I could have converted a fingerless pattern to regular mittens, but oh well!) I found a decent pattern and casted on, but a ways into it I realized I didn't like how it was turning out. I made a small revision, then another, then another, and finally the mittens didn't even resemble the mittens they started from. I am sharing these instructions to add more cute mitten patterns to the great interweb. So, enjoy these wonderful cabled and bobbled creations.
Notes:
-I wrote the instructions out for people who have knit mittens before. I don't suggest you start with these!
-These mittens have some holes due to the many bobbles. They are mostly for decoration and not for necessarily for warmth. I suggest wearing another pair underneath if you want to wear them in the cold.
Supplies:
Needles: 4 US size 8 double pointed needles
Yarn: 1 skein of Swish worsted from knitpicks.com (or 110 yards of worsted weight yarn)
Misc.: Darning needle, cable needle, stitch holder or waste yarn, scissors
Abbreviations:
M1: Make one stitch into next stitch, increase of one (insert needle as if to knit, wrap yarn around as if to knit, pull needle down and then go back into the stitch, knit normal and pull off needle)
3B: A small bobble. K1, P1, K1 into the next stitch. Turn the work. P3. Turn the work. Slip three stitches over the first stitch as if you were casting off. Knit into the back of the stitch. You should have no increase or decrease in stitches
5B: A large bobble. K1, P1, K1, P1, K1 into the next stitch. Turn the work. P3. Turn the work. Slip five stitches over the first stitch as if you were casting off. Knit into the back of the stitch. You should have no increase or decrease in stitches
CF4: A cable. Slip 2 stitches onto the cable needle and hold in front. K2 stitches from the left needle. Slip the two stitches back onto your left needle. Knit these two stitches.
K: Knit K2tog: Knit two stitches together K3tog: Knit three stitches together
P: Purl P2tog: Purl two stitches together
b/t: Between
Directions:
Cuff: Cast on 32 stitches
Work K2, P2 rib for 12 rounds (or however long you wish)
Left Mitten:
I've split the mitten part up into four sections to make the pattern easier to read (hopefully).
Round X: [Thumb] [Stitches before pattern] [Pattern] [Stitches after Pattern]
Round 1: [M1, K1] [K2] [P2, K4, P1, 3B, 5B, 3B, P1, K4, P2] [K11] - 33 Stitches
Round 2: [K3] [K2] [P2, K4, P1, K1, 3B, K1, P1, K4, P2] [K11]
Round 3: [K3] [K2] [P2, CF4, P1, K3, P1, CF4, P2] [K11]
Round 4: [K3] [K2] [P2, K4, P1, K3, P1, K4, P2] [K11]
Now start the thumb increases:
Round 5: [M1, K1, M1] [K2] [P2, K4, P1, 3B, 5B, 3B, P1, K4, P2] [K11]
Round 6: [Knit the thumb] [K2] [P2, K4, P1, K1, 3B, K1, P1, K4, P2] [K11]
Round 7: [M1 at beg. and end of thumb, K b/t] [K2] [P2, CF4, P1, K3, P1, CF4, P2] [K11]
Round 8: [Knit the thumb] [K2] [P2, K4, P1, K3, P1, K4, P2] [K11]
Round 9: [M1 at beg. and end of thumb, K b/t] [K2] [P2, K4, P1, 3B, 5B, 3B, P1, K4, P2] [K11]
Repeat rounds 6-9 until there are 15 stitches in the thumb, then knit Round 6 again. Place stitches on a stitch holder or waste yarn. Cast on 3 stitches and knit them. These three stitches are included in the next round as you will see below.
Now for the body of the mitten:
Round X: [Stitches before pattern] [Pattern] [Stitches after pattern]
Round 1: [K5] [P2, CF4, P1, K3, P1, CF4, P2] [K11]
Round 2: [K5] [P2, K4, P1, K3, P1, K4, P2] [K11]
Round 3: [K5] [P2, K4, P1, 3B, 5B, 3B, P1, K4, P2] [K11]
Round 4: [K5] [P2, K4, P1, K1, 3B, K1, P1, K4, P2] [K11]
Repeat rounds 1-4 until you have done nine CF4's for the entire pattern. End on Round 1.
Top of mitten decreases:
Round 1: [K1, K2tog, K2] [P2tog, K2tog, K2, P1, K3, P1, K2, K2tog, P2tog] [K1, K2tog, K1, K2tog, K1, K2tog, K2]
Round 2: [K4] [P1, K3, P1, K3, P1, K3, P1] [K8]
Round 3: [K2tog, K2tog] [P1, K1, K2tog, P1, K3tog, P1, K2tog, K1, P1] [K2tog, K1, K2tog, K1, K2tog]
Round 4: [K2] [P1, K2tog, P1, K1, P1, K2tog, P1] [K5]
Round 5: K2tog all stitches
Run remaining yarn through stitches and pull through the donut hole. Weave in ends.
Thumb:
Put the fifteen saved stitches on two needles.
With the third needle, pick up stitches around the thumb. (Enough so that there won't be holes)
On the first round, decrease to seventeen stitches, knitting.
Knit about ten rounds (or about 1/4-1/2 inch from the tip of your thumb)
Decreases:
K1, K2tog all the way around, K the last two stitches
Knit one round
K1, K2tog, all the way around, K the last two stitches
Finish like the top of the mitten.
Right Mitten:
The exact same as the left mitten, except the parts will be in a different order.
Instead of this from the left mitten:
Round X: [Thumb] [Stitches before pattern] [Pattern] [Stitches after Pattern]
It changes to this for the right mitten:
Round X: [Stitches after pattern] [Pattern] [Stitches before pattern] [Thumb]
And later
Round X: [Stitches before pattern] [Pattern] [Stitches after pattern]
Changes to:
Round X: [Stitches after pattern] [Pattern] [Stitches before pattern]
Decrease similarly and the thumb will be finished the same. Weave in ends, follow care instructions for the yarn you used, and enjoy!
I did my best to edit this pattern, but if you see any mistakes please leave a comment!
This pattern was last revised on March 17, 2012
No comments:
Post a Comment